Clash Verge runs on Windows 10 and above (64-bit). If this requirement is not met, please use the v2rayN instead.
Download
Click to download Clash Verge, unzip the file, and run Clash Verge.exe.
Add: If you cannot start Clash Verge, please download and install Webview2 and try again.
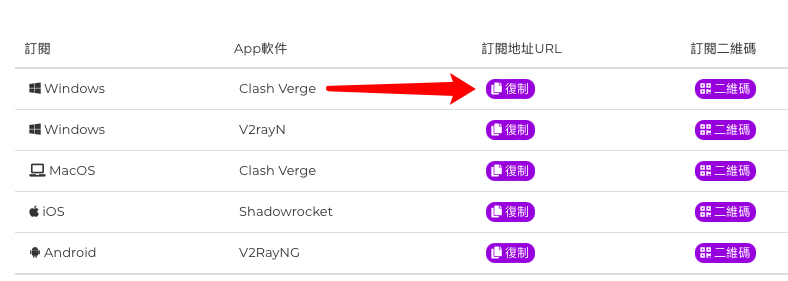
Copy Subscription URL
Log in to Client page. Go to “Service” -> “My products & services”, choose your corresponding service. Copy “Subscription URL”.
Configuring and Connecting
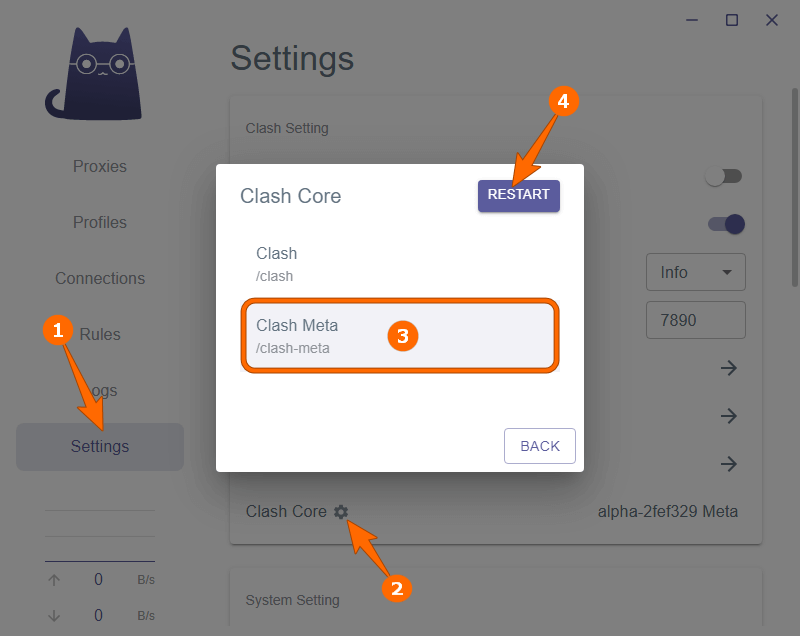
Click on the Clash Verge "Settings" option, change the Clash kernel to "Clash Meta", and then click "RESTART" to take effect.
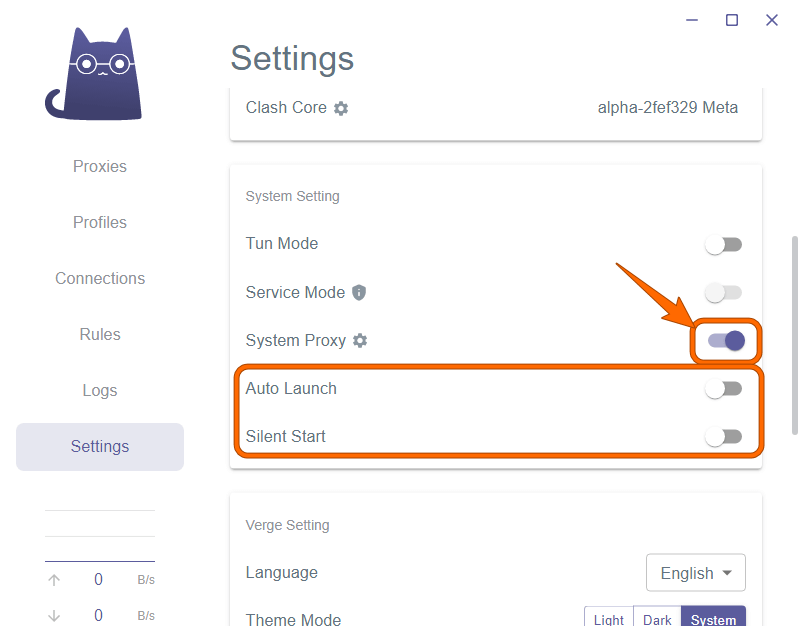
Next, enable the "System Proxy" option. The following two "Boot" options are also recommended to be enabled.
Click on the Clash Verge "Profiles" option, fill in the "URL" box with the previously obtained subscription address, click on "IMPORT" and select the downloaded profile.

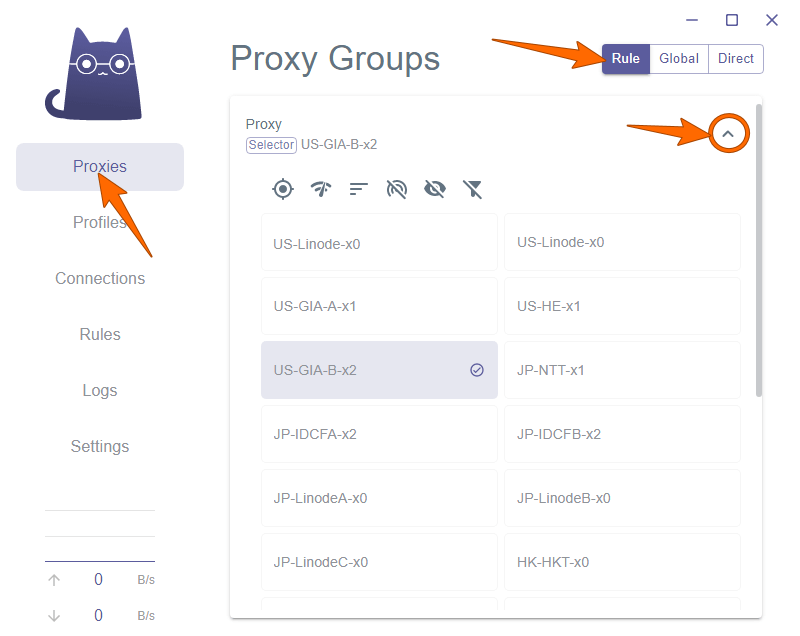
After completing the configuration, click on the "Proxies" option of Clash Verge and click on the top right corner to switch the proxy mode (usually use the "Rule" mode. If you need all access to be through a proxy, select "Global" mode). Click the "Arrow Icon" on the right side of the Proxy to expand the list of nodes.
At this point, you can start using it.